رسم العين بطريقه محترفه جدا
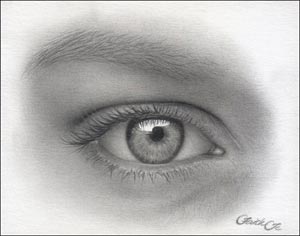
Here is the first tutorial from Art Studio — a female eye. My method
in graphite pencil drawing aims to render subjects as realistically as I
can. The following is a step-by-step demonstration of how I draw eyes.
While I very much hope that it helps you in drawing realistic eyes, do
experiment and develop your own way of drawing. I myself sometimes do
not follow some of the steps exactly as I like to experiment and try to
find better ways of achieving a specific texture or effect. Before I
begin, many thanks to Toni-Marie Hudson for the use of her picture.
Toni-Marie does animal paintings in mixed media. Visit her web site to
view her extremely realistic paintings
Drawing the Human Eye
 |
drawing eye
|
Here is the first tutorial from Art Studio — a female eye. My method
in graphite pencil drawing aims to render subjects as realistically as I
can. The following is a step-by-step demonstration of how I draw eyes.
While I very much hope that it helps you in drawing realistic eyes, do
experiment and develop your own way of drawing. I myself sometimes do
not follow some of the steps exactly as I like to experiment and try to
find better ways of achieving a specific texture or effect. Before I
begin, many thanks to Toni-Marie Hudson for the use of her picture.
Toni-Marie does animal paintings in mixed media. Visit her web site to
view her extremely realistic paintings.
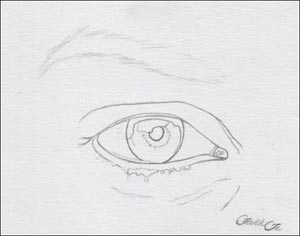
Step One
The outline on Canson Grain. Since the outline was very light and
will likely be smudged off when I start rendering or shading, I have
carefully and lightly retraced the lines with a soft pencil. In this
case, a Faber-Castell 0.5 mm 2B mechanical pencil.
رسم العين بطريقه محترفه جداdrawing eye

رسم العين بطريقه محترفه جداdrawing eye
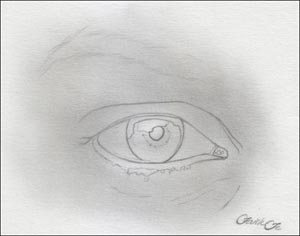
Step Two
Using a soft brush dipped in small amounts of graphite powder, I
cover the outline with two or three layers of tone. Any brush can be
used as long as it produces a very smooth effect and fills in the tooth
of the paper. I try to avoid getting tone on the highlight of the iris.
If I do get any graphite there, I tap the area with a clean kneaded
eraser.
رسم العين بطريقه محترفه جداdrawing eye

رسم العين بطريقه محترفه جداdrawing eye
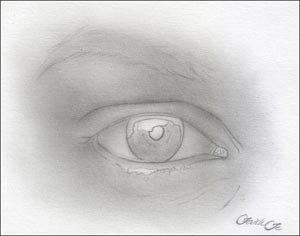
Step Three
Using a smaller version of the brush I used in the previous step, I
begin forming the shapes of the eye by defining the darker areas..
رسم العين بطريقه محترفه جداdrawing eye

رسم العين بطريقه محترفه جداdrawing eye
Step Four
With a kneaded eraser, I cleaned up the highlights.
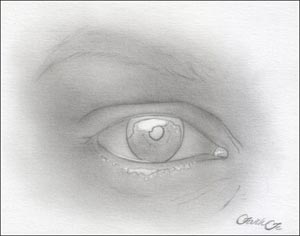
رسم العين بطريقه محترفه جداdrawing eye

رسم العين بطريقه محترفه جداdrawing eye
Step Five
I used a Dong-A 0.5 mm 2B mechanical pencil to draw the darkest areas
like the pupil, shadow on the upper part of the iris and the crease of
the upper eyelid.
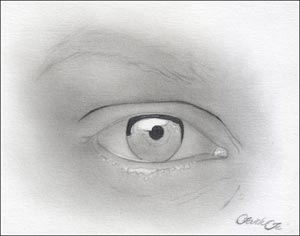
رسم العين بطريقه محترفه جداdrawing eye

رسم العين بطريقه محترفه جداdrawing eye
Step Six
Concentrating on the iris for now, I use a hard pencil (5H Staedtler)
and fairly hard pressure to draw spokes originating from the pupil.
This will keep the paper from absorbing a lot of graphite in the next
stage.
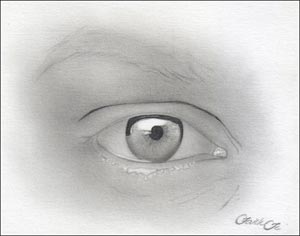
رسم العين بطريقه محترفه جداdrawing eye

رسم العين بطريقه محترفه جداdrawing eye
Step Seven
Having used a 5H on the previous stage, I can now draw darker shades
on the iris using a dark pencil (2B mechanical pencil). The reason why I
use 2B is because it spreads more easily. The 5H is also to keep the
tones very smooth when darker tones are added.
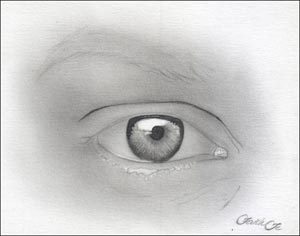
رسم العين بطريقه محترفه جداdrawing eye

رسم العين بطريقه محترفه جداdrawing eye
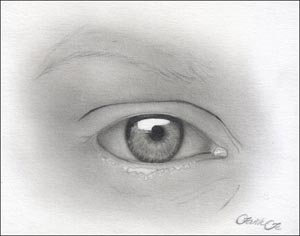
Step Eight
I further worked on the iris erasing and adding graphite as much as
needed to create varied tones. Moving on to the white of the eye, it was
also covered with a layer of 5H to create a smooth effect. Then I used a
2B mechanical pencil on the shadow areas to form the eyeball.
رسم العين بطريقه محترفه جداdrawing eye

رسم العين بطريقه محترفه جداdrawing eye
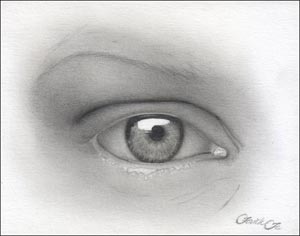
Step Nine
Here I began working on the skin. Using a 0.5 mm HB mechanical pencil
and a light circular motion, I added tones to the upper eyelid and the
surrounding skin - starting first on an area which will receive more
graphite (in this case, the skin around the crease) and moving towards
lighter areas. I used a shop towel and a brush to smoothen out rough
spots.
رسم العين بطريقه محترفه جداdrawing eye

رسم العين بطريقه محترفه جداdrawing eye
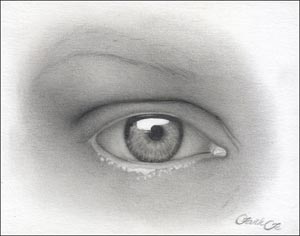
Step Ten
Continued with the lower part of the skin.
رسم العين بطريقه محترفه جداdrawing eye

رسم العين بطريقه محترفه جداdrawing eye
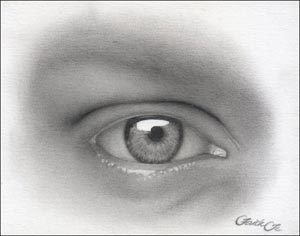
Step Eleven
Still continuing with the HB mechanical pencil. I’ve now added
shadows to the skin. The 5H Staedtler pencil was also used on the
thickness of the lower eyelid. 2B mechanical pencil was used for its
darker areas.
رسم العين بطريقه محترفه جداdrawing eye

رسم العين بطريقه محترفه جداdrawing eye
Step Twelve
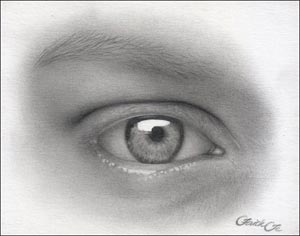
To create the wrinkles on the skin, I lightly drew lines with the HB
mechanical pencil and then used a kneaded eraser to create fine
highlights beside each line. A paper stump and a brush were used to
soften and blend the lines. The same method used on the white of the eye
was also used on the tear duct. The HB was used for the eyebrow —
starting with the root of each hair and lessening pressure towards the
tip.
رسم العين بطريقه محترفه جداdrawing eye

رسم العين بطريقه محترفه جداdrawing eye
Step Thirteen
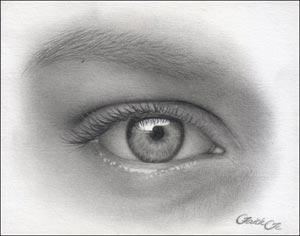
I always try to keep from drawing the eyelashes until the skin
underneath is finished. Since the upper eyelashes will be darker than
the lower eyelashes or the eyebrow, I used a Dong-A 2B mechanical pencil
which is much darker than a Faber-Castell of the same grade. Again,
following the direction of growth and starting from the root, lessening
pressure as I come to the tip. Reflections of the eyelashes were also
drawn on the highlight of the iris.
رسم العين بطريقه محترفه جداdrawing eye

رسم العين بطريقه محترفه جداdrawing eye
Step Fourteen
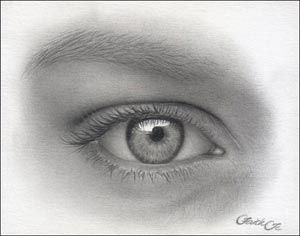
The lower eyelashes were drawn with the Faber-Castell 2B mechanical pencil.
رسم العين بطريقه محترفه جداdrawing eye

رسم العين بطريقه محترفه جداdrawing eye
Step Fifteen
The final eye. Finishing touches were made and some of the highlights
on the lower eyelid were dulled a little. I hope you find these steps
and images informative and helpful.

رسم العين بطريقه محترفه جداdrawing eye

رسم العين بطريقه محترفه جداdrawing eye


0 التعليقات:
إرسال تعليق